 To end our back to basics series I want to bring you on a photo tour of the inside of a PC, pointing out some of the items we discussed during the course of this series. Remember, to see any picture in more detail just click on it.
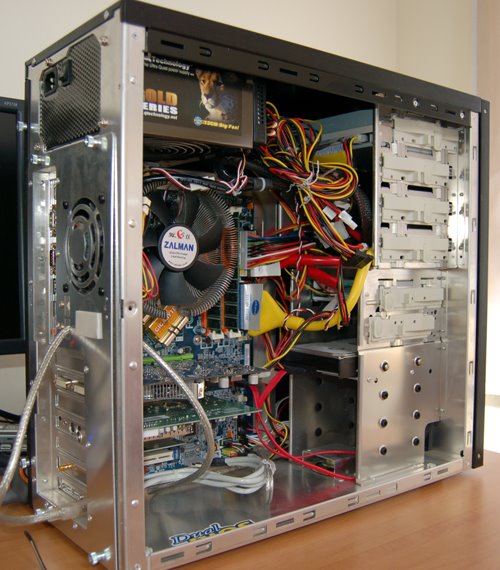
First up and overall view of the PC we will be looking at with its side panel removed. For those who weren't paying attention, the rear of the PC is on the left!
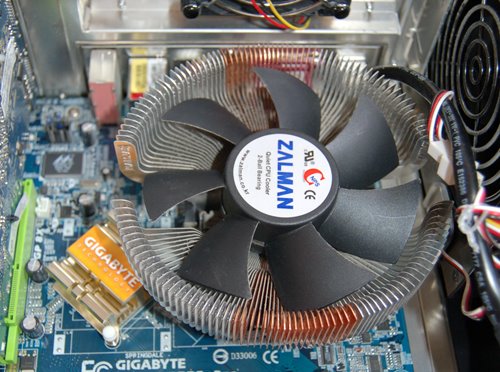 Moving in in more detail, the next picture shows the heatsink fitted to the CPU. The actual CPU can't be seen in the picture because the heatsink is mounted on top of it. The heatsink used on this PC is a low-noise type made of copper and aluminium made into a series of radial blades that present a large surface area for heat transfer. The large, low-speed fan in the centre of the heatsink only comes on when the CPU exceeds a certain temperature. Because this particular heatsink is very efficient at dispersing heat on its own, the fan remains off most of the time, leading to a quieter PC.
 The next picture shows the memory modules mounted in the motherboard memory slots. This motherboard has four memory slots (2 x purple and 2 x orange) and two of the slots are occupied with 512MB of DDR2 RAM in each, for a total of 1GB of RAM.
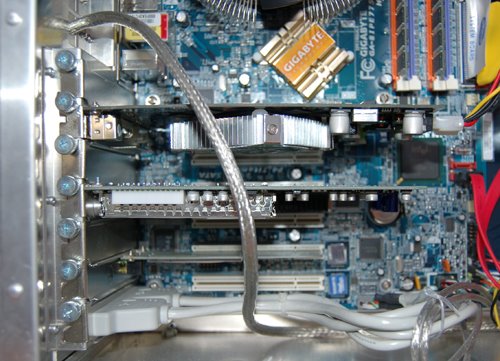 Now we're looking at the PCI slots on the motherboard, of which there are five. The slot above the first PCI slot is the AGP slot and contains an AGP graphics card. Moving downwards, the first PCI slot is unoccupied. The next one down contains a TV tuner card. The third slot is unoccupied while the fourth slot contains a wireless network card. The final slot is empty. Just because there are five PCI slots on a motherboard, it does not always mean that you can use all five of them. For example, because of the large heatsink on the graphics card in the AGP slot, there is little room for fitting a card into the first PCI slot.
 The hard disc shown in this picture is a relatively recent type referred to as a parallel type, as opposed to the older and more common serial type. The principal difference between them is the connectors. Rather than using the wide ribbon data cables I discussed in the section on hard disc drives, the unit shown in the picture uses a smaller and more easily fitted parallel cable (red in the picture). The other difference is the power connector which isn't the typical Molex type but a slimmer design. Otherwise the hard disc drive types are indistinguishable and the disc is mounted in its usual position at the bottom front of the system case.
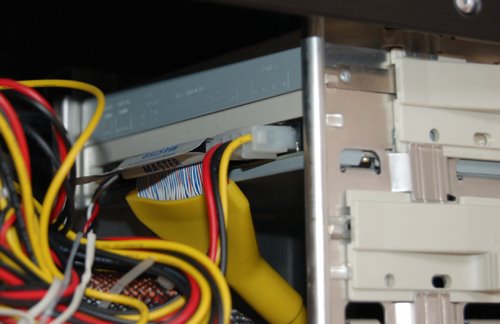 This PC is fitted with a single optical drive, a CD-RW unit, located at the top front of the system case. In the picture you can see the multi-strand ribbon cable attached to the drive (this is a special type of ribbon cable rolled into yellow tubing to take up less space in the system case) as well as the 12V Molex power connector.
The power supply unit, or PSU) is fitted to the top rear of the system case and in the picture
 you can see part of the wiring loom that comes out of this unit. The following picture shows where the ATX power connector fits onto the corresponding socket on the motherboard.
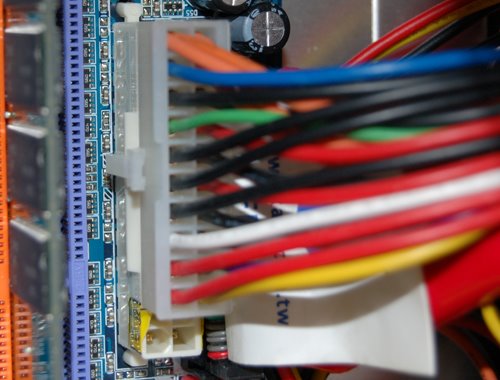
Finally, a picture of the back of the case that shows, from the top down, the rear of the PSU (in
 brown), the on-board connectors that are built in to the motherboard (these are the mouse and keyboard PS/2 connectors, 2 x serial port and 1 x parallel port connectors, 4 x USB ports, an ethernet port and 3 audio sockets for loudspeakers and microphone). Click on the picture to see a larger version. Note that I didn't deal with the parallel and serial ports in my earlier articles as these are used less and less (if you have an old printer you may still be using the parallel port - sometimes called the printer port).
To the right of the on-board connectors is one of the system case fans, which exhausts warm air from the case.
The bottom section is where the connectors from the AGP graphics card and PCI cards emerge into the world.
So, there you have it. Hopefully, if you have been following our Back to Basics series from the beginning, you now have a better understanding of the different components that come together to make your PC work.
No comments:
Post a Comment