Monday, April 17, 2006

Back to Basics - The CPU

The CPU, or central processing unit, is the heart of the computer. If your computer has a little Intel Inside sticker on the system case then the CPU is the bit made by Intel, though not all CPUs are made by Intel. It is the CPU that executes or runs programs (such as a word processor or a web browser) through the means of digital logic circuits within the CPU chip.

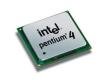
The CPU consists of a single microchip mounted on a supporting structure of connector pins. It is these pins that mate up with the CPU socket on the motherboard and through these pins that the CPU can communicate with the other electronic components either integrated into the motherboard or connected to the motherboard. The pictures on the left show an actual Intel Pentium 4 CPU. The picture furthest left is of the underside of the chip and shows the array of pins around the processor that will plug into the motherboard CPU socket. The picture near left shows the top of the CPU as it would appear when inserted in the motherboard.
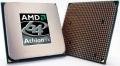
In addition to Intel, there is really only one other player when it comes to CPUs for PCs and that is AMD. AMD has been the arch rival of Intel for many years and has steadily increased its market share. AMD CPUs are generally cheaper than Intel equivalents and this has led to their acceptance by value-based manufacturers such as Dell and Packard Bell.
Irrespective of whether your PC has Intel or AMD inside (and both are equivalent in terms of what they can do and reliability) what determines how fast the CPU runs is the clock speed. Every computer contains an internal clock that regulates the rate at which instructions are executed and synchronizes all the various computer components. The CPU requires a fixed number of clock ticks (or clock cycles) to execute each instruction. The faster the clock, the more instructions the CPU can execute per second. Clock speeds are expressed in megahertz (MHz) or more commonly gigahertz (GHz). If you have purchased your PC in the last two years it will probably have CPU that runs at a clock speed of between 2.0 and 3.4 GHz. If your PC is 6-7 years old then its CPU may be running at 400-800 MHz. The higher the clock speed of your CPU the faster your PC is capable of running (though other factors can affect the actual performance of your PC).

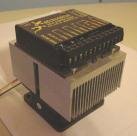
It's difficult to talk about CPUs and not talk about heatsinks as the two are practically inseparable. Modern CPUs generate a lot of heat, particularly as the clock speeds have increased. In fact they now generate so much heat during normal operation that they would burn out in a few seconds if that heat was not efficiently removed. And that is the role of the heatsink. If you open up any modern PC and look for the CPU you will not be able to see it - the reason for this is that a heatsink is firmly bolted to the top of the CPU chip to draw away the heat it generates. Heat sinks come in many different shapes and sizes, but they all work on the same principle. A heatsink consists of a large piece of heat conducting metal (normally aluminium or copper, both of which are efficient conductors of heat). The piece of metal will have one side milled to a mirror-smooth surface and this is placed in contact with the top of the CPU. Between the two there will normally be a thin layer of a heat conducting paste. The top of our block of metal will normally be shaped to present a large surface area which dissipates the heat to the air and a fan is generally fitted to assist with the dissipation of heat. Here are some pictures of heatsinks.



The CPU is generally the singularly most expensive component in the PC, even though it is arguably the smallest physical component, and can represent over 50% of the cost of your computer. A replacement 3.2 GHz Pentium 4 CPU is currently listed at €420. Failure of CPUs is uncommon, but can happen, often as a result of overheating due to impaired ventilation.

Tomorrow we'll talk about RAM (memory, not male sheep).

Saturday, April 15, 2006

Back to Basics - The Motherboard

Now the fun really begins as we start looking at the bits of the PC that you normally never see, and we'll begin with the system motherboard. The motherboard, also called the mainboard, is the large printed circuit board which is the elecronic hub of your PC. Not only does this circuit board host the Central Processing Unit, or CPU, which is the brains of the computer, it also either hosts additional plug in process cards or has features that can come on plug-in cards actually built into the motherboard itself. More on this in a minute.

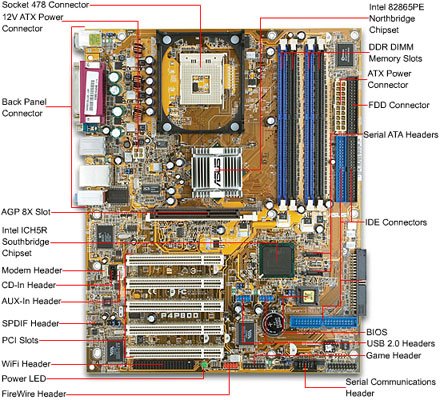
Let's start by having a look at a typical motherboard. This one is for an Intel Pentium 4 CPU and the CPU chip will plug into the Socket 478 Connector at the top center of the board (more on CPU chips again). Next we would have the memory chips or RAM (random access memory)plugged into the vertical blue and black slots in the upper right section of the board (labelled DDR DIMM Memory Slots - DDR DIMM stands for double data rate dual in-line memory modules, we love our acronyms in the PC business!).

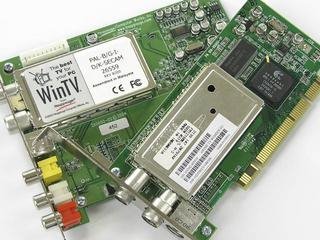
Many of the features we find on a modern PC, such as an Ethernet port to connect to a local area network, a modem to dial into a network, sound capability to allow music and sounds to be heard, graphics capability to permit us to see our system on a monitor, used to require separate expansion cards which were plugged into expansion slots on the motherboard. So, if you wanted to dial into the Internet you would have had to physically install a modem in one of the five white horizontal PC slots you can see in the bottom left of the board. With the advances in motherboard design in recent years you can now find motherboards with all the extras built in, leaving the PC slots more or less redundant for many users. A function that used to require a separate expansion card in the past has been minaturized to just one more chip integrated into the motherboard. However, not all functions have yet been integrated into the motherboard so, for example, if you want a PC that can display TV on your monitor, you will need to add a TV tuner card to one of your PCI slots, like one of the ones in the picture. Also, some of the funtionality integrated into motherboards is often quite basic, a good example being the graphics processing capability built into many motherboards. The onboard graphics chip will display your screen perfectly adequately for 2-D applications, such as your word processor or web browser. However, these are generally completely inadequate for playing 3-D games of the type that are common today. While some of these games may run, they will run very slowly or jerkily and the experience will be frustratingly poor. Because of this a whole market has arisen in add-in graphics cards and these are plugged into the brown horizontal slot, above the PCI slots, labelled AGP 8X Slot (AGP = accelerated graphics port).

The optical drives (CD or DVD) in the front of your PC are connected to the blue and black IDE connectors on the right side of the board by flat ribbon cables, normally grey in colour. The floppy disc drive, if you have one, is connected by a similar cable to the FDD Connector, again on the right side of this board.

Power is brought to the board by means of two connectors that extend from the power supply unit (PSU). These are plugged into the ATX Power Connector (beside the FDD Connector) and the 12V ATX Power Connector at the top left of the board.

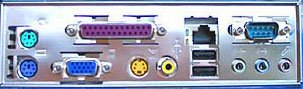
The Back Panel Connector (top left edge of board) contains the only part of the motherboard that you are likely to see from time to time. This is the collection of sockets that you connect your mouse, keyboard, monitor, printer, and various USB devices to and this protrudes through a slot at the rear of your system case, like in the picture. You should note that while the motherboard in your PC will have all of the elements that I have highlighted they may be in a completely different location than in the example above. There are thousands of different motherboard designs and each manufacturer will lay out the components on the board differently.

Friday, April 14, 2006

Back to Basics - The System Case

The system case, at its most basic, is a box made of steel or aluminium, the former often covered with plastic, that houses all the electronics that comprise your computer. It will have a power on switch and may also have a reset switch. Probably it will have a couple of lights on the front panel, one indicating the power on status and the other displaying hard disk activity. Normally there will be a vent at the front for air to pass into the case and another vent at the rear for air to pass out. At the front there will be positions for mounting optical drives (CDs/DVDs), floppy drives (getting less common) and card readers (getting more common).

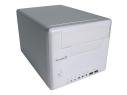
There are a number of distinct physical formats that cases come in, but the most commonly encountered format in the home is the midi-tower which stands vertically. Though less common, you may have a desktop case which sits horizontally on the desk. Also starting to appear in the market are small format cases such as the Shuttle series.


The purpose of the case is threefold. First it provides a structural framework in which all other components can be mounted. Secondly it provides protection to the sensitive components that make up your PC from electrostatic discharge and from physical damage (imagine the damage your cat might do if he got access to the computers innards!). Finally it provides correct ventilation for the removal of the often considerable heat that modern PCs generate. Without this heat removal the PC would overheat and fail.

To get inside a typical midi-tower case normally involves removing a couple of screws at the rear of the case that hold the side panel in place. Once these are removed the side panel generally just slides off.
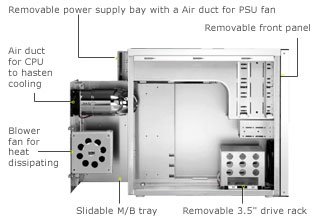
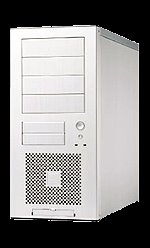
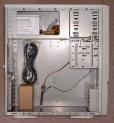
The picture at left shows an empty midi-tower case with the side panel removed and before any of the electronic components have been fitted. While a lot of midi-tower system cases may look different on the outside, they all conform to a standard, known as the ATX standard, on the inside. This standard ensures that all power supplies that conform to the ATX standard will fit the case, and that the mounting points for the system motherboard are all in specified positions. There is a standard location in the system case for most of the electronic components that make up your PC. With reference to the picture on the left, the power supply unit will be located in the top left corner of the case, the optical drives in the top right, the hard drive(s) in the bottom right and the system motherboard (more on this later) in the main open area.

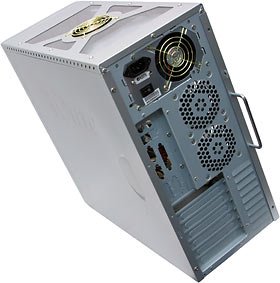
The rear of the system case is where the sockets on the motherboard emerge, as well as the sockets on any PCI expansion cards or AGP/PCI Express video cards that may be fitted - we'll be covering more on those in future Back to Basics episodes. For now I'll leave you with a picture of the rear of a typical midi-tower system case that has yet to have any internal components fitted.

Next up, the innards.


Thursday, April 13, 2006

Back to Basics - Mice and Keyboards

While the monitor allows you to see what your input to the computer is and what the computer's response, or output, is to that input, it is the mouse and keyboard that allow you to get your inputs into the computer in the first place.

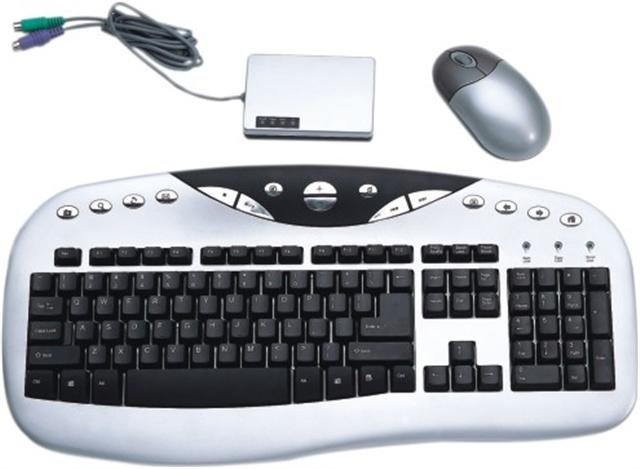
There are three basic ways in which the mouse and keyboard can connect with your computer. The first and oldest way is via PS/2 connectors which were introduced by IBM in their first personal computers and were widely adopted by other manufacturers. These are 3/8" round 6-pin connectors that plug into corresponding sockets at the rear of the system case. Over the years a semi-informal colour coding of the connector and socket has been introduced with the mouse being colored green and the keyboard coloured violet (note that this is not universally adopted by all manufacturers and orange can be found used commonly for the keyboard). The connectors and sockets are keyed, which means that the connector will only go into the socket in one particular orientation. Trying to force the connector into the socket in the wrong orientation can lead to damaged pins, a not uncommon problem. While all older PCs and most newer ones will have PS/2 sockets fitted, some newer PCs designated as "legacy-free" do not have them. This is rarely a problem as most newer PCs can use mice and keyboards based on USB connectors. One point to note is that although PS/2 connectors for the keyboard and mouse are physically the same, if you plug them into the wrong socket at the back of your computer the machine will generally stop booting and present a "keyboard error" on the screen.

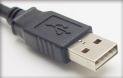
The second way of connecting mice and keyboards to PCs is using USB connectors and sockets, which are present on all PCs manufactured in the last 10 years. These will be familiar to most PC users and as soon as you plug in either a keyboard or mouse it should be recognized by Windows as a "HID-compliant device" - HID standing for Human Interface Device, a grandiose way of describing a keyboard or mouse.

The final way of connecting your mouse and keyboard to your PC is wirelessly. Well, it's not truly wirelessly, as you must plug in a small wireless receiver to your PS/2 or USB port (both PS/2 and USB versions are available) and place this receiver on the desk that you are working on. Once this is done you need to pair the mouse and keyboard with the transmitter, normally by pressing synchronisation buttons on both units at the same time. As the mouse and keyboard are not connected directly to the computer they need a power supply to run their small wireless transmitters and this is supplied by batteries, either disposable or rechargeable. I favour rechargeable ones as you don't have the environmental issues associated with disposing of spent alkaline batteries.

Keyboards can now be purchased with all sorts of extra "multimedia" buttons on them that do everything from launching Google to adjusting the volume of your loudspeakers. Personally, I'm not a big fan of these, but if you find the additional features useful and you're willing to pay for them, then go for it.

When it comes to mice there are a multitude of different flavours of the same principle, all of which basically do the same job of moving the cursor around your screen. However, there is only one solid piece of advice that I would give you in relation mice. And it is this. If you still use a mouse with a ball in its base, place it in your bin, put your bin out for collection and buy an optical mouse. Optical mice have no moving parts and consequently do not jam up with fluff and detritus from your desk, resulting in jerky, stop-start movement. Get an optical mouse for around €10 and you'll never look back.

Coming next, the system case.

Wednesday, April 12, 2006

Back to Basics - Monitors

A number of customers have recently referred to their system case as their hard drive or their monitor as their computer or their hard drive as their RAM, so I thought it might be a good idea to have a quick run through of the various different components that make up your average computer so that we can all have a clear understanding of what's what.

The PC that you have at home will generally have a minimum of four components - these are the monitor, the keyboard, the mouse and the system case. Today we're going to briefly visit monitors and we'll cover the other components in the coming days.

The monitor is the part of the computer that you spend most of your time interacting with so make sure that the one you have is easy on your eyes and correctly set up. Up to 2 years ago the commonest type of monitor was cathode ray tube (CRT)-based - using similar technology to standard TV sets. These monitors can give very good pictures but suffer from being bulky, especially those with a screen size over 17", and they consume quite a bit of power. CRTs are being phased out and now it is almost impossible to buy one, except very expensive high-end units used for critical colour work. They have been replaced by LCD flat screen monitors that take up much less desk space and use a lot less power. Typically these are 17" or 19" diagonally across from top-left to bottom-right and prices have fallen dramatically over the past 12 months - you can now but a 17" model for just over €200.

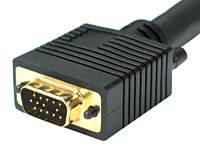
As well as a power cable your monitor will have a cable with one of two types of connector at the end. CRT monitors and cheaper LCD will have a 15-pin D-Sub connector (although there will probably only be 14 pins present) and this is connected to a corresponding female socket, which is almost always coloured blue) on the back of your system case. More expensive LCD monitors will have a cable with a beige DVI (digital video interface) connector that mates with a beige female connector on the back of your system case. The DVI connector keeps the picture in the digital realm as it passes from the computers graphics processor to the monitor. On the otherhand, the D-Sub connector handles a signal that has been converted from digital to analog. In theory the DVI cable (and the graphics processor that it is connected to) should give a better picture, however, we have both digital and analog monitors here at PC Medic as well as one dual input monitor, and we can't honestly say that there is a big difference in picture quality, at least for what we use our monitors for.

What we commonly see in home PCs are monitors that are poorly set up, particularly CRTs. There are three important things to consider with CRT monitors - the screen refresh rate, the picture geometry and the screen resolution. Screen refresh rate is how many times a second the image is redrawn on a CRT. If this is too low, say 60 Hz, you may find that the screen appears to flicker and this will lead to eye strain after some time. Your screen should be set to the highest refresh rate supported by your monitor, in line with the manufacturer's guidelines (see handbook that came with monitor). Screen geometry is how the picture is aligned on the screen and this can normally be changed by using a combination of buttons on the front of the monitor together with an on-screen display (OSD.). Using the OSD you should be able to adjust the horizontal and vertical size of the display (commonly badly set up by users leading to an under utilized screen with a dark edge around one or more sides of the screen) as well as picture position and correct for barrel and pin-cushion distortion. Screen resolution dictates how many pixels, or dots that compose the image, are present on the screen. A low resolution, say 600x800, on a 19" monitor will mean a very chunky display that requires much scrolling to see the full image. Conversely, a resolution of 1200x1600 on a 15" screen (if supported) will lead to a highly detailed screen but with the characters and icons too small to be easily readable. My own preference is for resolutions of 1024x768 for a 15" screen, and 1200x1600 for a 17"-19" screen.

Refresh rate and geometry settings are not relevant for LCDs but screen resolution is, so find the optimum level for your screen.

Next up, of mice and keyboards.

Saturday, April 08, 2006

Improve Your Memory

One observation that many computer owners make to me is that their PC seems to be running much more slowly than it did when they bought it. In some of these cases the reason is due to the machine being infected by spyware. But in many cases the machine is clean but is still running slower than it was originally. Usually it's easy to figure out why this is the case.

In order to cut costs, many PC manufacturers skimped on the amount of memory they fitted to PCs. This was particularly true 3-4 years ago, but still happens to some extent today, particularly with laptops. According to Microsoft, Windows XP will run on a machine with only 64MB of RAM and, to some extent, it will, but you will not have a PC that is usable. By and large, 128MB is the practical minimum that you need to run Windows XP. However, open more than two or three programs at the same time and again your machine will start to run extremely slowly. 256MB of ran is better but, to my mind, 512MB should now be considered the minimum amount of RAM to be fitted to a PC running Windows XP (note that Windows 98 and Me have a much more modest RAM requirement and can happily work with 64-128MB of RAM).

If a machine is running slower today than it was when purchased, it is probably down to the fact that there are more demands being made on the memory as a result of more programs loading into memory on startup. You can get an idea of how many programs are running by looking at your System Tray at the bottom right corner of your screen. The picture above shows the system tray of my laptop, which is pretty busy, indicating that I have quite a few programs running at the same time - many of these are running in the background and do not appear as active windows on the desktop. To check how much memory you have on your system and how much is being used at any point in time you want to open the Task Manager. You can do this by pressing Ctrl-Alt-Del which opens the Task Manager, which has a number of tabs. The tab you want to select is the Performance one, shown in the picture on the left. The section headed Physical Memory lists the amount of physical RAM on your machine under the Total heading - 523184 in my case, which corresponds to 512MB. The amount free at the time that I took the screenshot was ~73MB, which is just about 14%, not a lot. This is echoed by the fairly high PF (Page File) Usage figure of over 500MB. The Page File is an area on your hard disk that the system uses as virtual memory if the actual amount of physical RAM installed on the computer is becoming full. Because data is transferred much more slowly between the CPU and the hard drive than between the CPU and RAM, high PF Usage can lead to sluggish behaviour of the PC, and my laptop is not exactly flying at he moment. Time for either a clean out of un-needed programs or the addition of another 512MB of memory I think.

The bottom line is that upgrading your physical RAM to 512MB, or better still 1GB, is without doubt the most cost-effective way of improving the overall performance of your machine.

Wednesday, April 05, 2006

Why PCs Die - Part III

Upgrading your PC is relatively easy to do yourself, as long as you inform yourself about the task in advance and have an average amount of manual dexterity. Unfortunately sometimes owners will decide to perform an upgrade without having a clear understanding of the pitfalls that can arise in the course of performing it.

So what kind of things can go wrong during an upgrade that can leave you with a dead PC? Number 1 on the pitfalls list is ESD, or electrostatic discharge. This occurs when static electricity builds up on your body and you then touch a component in the computer. As the computer is generally at a lower potential to your body static electricity will jump from your body to the computer and this discharge is sufficient to fry many of the sensitive semiconductors on your motherboard and plug-in cards. While you can feel electrostatic discharges of 3,000 volts, smaller charges are below the threshold of human sensation. Unfortunately, smaller charges can and do damage semiconductor devices. Many of the CMOS technology components used in PCs can be damaged by charges of less than 1,000 volts. Some of the more sophisticated components can be damaged by charges as low as 10 volts. Some common activities that generate static electricity on your body include:

Walking across a carpet, 1,500 to 35,000 volts
Walking over untreated vinyl floor, 250 to 12,000 volts
Worker at a bench, 700 to 6,000 volts
Vinyl envelope used for work instructions, 600 to 7,000 volts
Picking up a common plastic bag from a bench, 1,200 to 20,000 volts.

I had one computer in recently where the owner had decided to upgrade the video card with a newer model. When he changed cards the PC wouldn't POST so he thought that he had a dud video card. He then put back the old card only to find that the PC still wouldn't POST. The problem was that he had no knowledge of the risk of ESD or how to eliminate it which had resulted in him frying his motherboard - an expensive mistake.

An upgrade that many people consider is adding extra memory and, in theory, this is one of the easiest upgrades to perform. However, what many people are suprised to find is that inserting modern memory modules e.g. DDR2 type, requires a heck of a force to get the module into the slot, up to 30 kgs in fact. Many first time upgraders struggle when they come up against the level of force required and can in fact apply too much force in a desperate attempt to get the module seated. The problem with applying excessive force is that the underlying motherboard can flex and, if luck is against you, break a conducting track, resulting in a dead board and a dead PC.

The next upgrade that can go wrong is one that I've had personal experience of and goes to show that even when you (think) you know what you're doing, things can go wrong. This one involves adding a new hard disk to your PC, either replacing an existing one or adding a second. The hard disk is connected to the motherboard with an IDE cable (newer SATA drives use a different cable and what I am about to describe doesn't apply to them) that plugs into a 40-pin connector on the hard disk (see picture). Now the thing about the 40-pin plug on the end of the IDE cable quite often has a solid block of plastic where it mates with the the absent pin 20 in the hard disk connector. If the plug is inserted into the connector wrong way round (pin 1 lined up with pin 40 and pin 39 lined up with pin 2) then the solid block of plastic on the plug crushes pin 19 and you have a dead disk and a PC that cannot boot. Believe me, this is easier to do than it should be and can happen because the connector and plug are not adequately keyed to prevent misalignment and the pins are made of a very soft metal that bends too easily. On the one and only occasion that this happened to me I was able to straighten the crushed pin 19 with some long-nosed pliers and rectify the situation.

Saturday, April 01, 2006

Latest Spyware Threats

The top 10 spyware threats for the first quarter of 2006 were as follows:
- 180 Search Assistant
- Apropos
- Virtumonde
- SpywareStrike
- EliteBar
- ISTBar
- CoolWebSearch (CWS)
- PSGuard
- SurfSideKick
- DirectRevenue - ABetterinternet

Friday, March 31, 2006

Wireless Network Problems

Wireless networks are a great boon for allowing access to the internet from throughout your household without the inconvenience of wires. However, certain items found in the home, such as cordless (not mobile) phones, microwave ovens and fluorescent lights, can interfere with the signal and cause connectivity to be lost. Other issues, such as the quality of the incoming phone line and the presence or absence of DSL filters on all phone equipment can also contribute to whether you have intermittent connection problems.

PC Medic has put together a troubleshooting guide for home wireless networks that is available free to all our customers. Just e-mail me at brendan@pcmedic.ie for your copy.

Thursday, March 30, 2006

Be(bo) Aware


Hands up all those who know about Bebo, the latest craze to be sweeping through the youth of Ireland. Mmmm.. not that many hands raised. While it is estimated that there are in the region of 500,000 young people in Ireland with Bebo accounts, it is also estimated that only a fraction of the parents of those 500,000 youngsters are aware of what their offspring's accounts contain. But first, what is Bebo? This is taken from their help page.

Bebo also allows you to share Photos, Blogs, draw on your own and other members' White Boards, and, oh, a lot of other stuff too.
If you are a student you can join your school or college to hang out with other students in your own school or college. Or you can join your old school or college as an Alumni to catch up with past students.


So, there you have it, good clean fun. And in most cases that's what it is, kids being kids. In many of the blogs I've seen the main subject for discussion is the amount of alcohol they can consume, their musical tastes and their interest in the opposite sex. In a lot of cases the most appaling thing on the sites is the massacre of the English language with poor spelling, optional grammar and a propensity for text-speak - U no wht I mn? So is there anything to worry about? Maybe.

First off, while you can set up your account so that only friends can see the content (what's the fun in that?) many young people are making their accounts public for (literally) all the world to see. They are also not following Bebo's (good) advice to not use their own names nor to reveal any personal details. Many of the sites I reviewed for this article are littered with personal (and sometimes revealing/embarassing) details and photos of the site's owner and their friends, together with the friends' names and often personal details about them. Given that Bebo allows kids as young as 13 to have accounts (and they have no way of preventing younger kids from getting accounts), you don't need to be a genius to work out that the wrong kind of audience might be attracted to the site.

Another thing that the kids posting details about themselves tend to forget about is the persistence of the web. Something that you may want to brag about today may be all too easy for a potential employer to find when they Google your name in five years time - something that some employers are already doing today.

So, if you do use Bebo, follow the site's good guidelines and stay anonymous. And if you're a parent, why not ask your kids about their accounts, I'm sure they'll be happy that you are expressing an interest and delighted to show them to you. Sure, why wouldn't they?

Sunday, March 26, 2006

Linksys ADSL Wireless Gateway

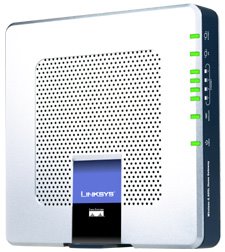
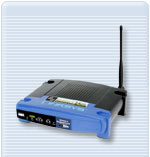
PC Medic has started using Linksys WAG354G ADSL wireless gateways, which have replaced the older WAG54G model (small picture). The most obvious difference between the new and old units is that Linksys has put the newer model in a more contemporary slimline silver package and the external antenna has been replaced with an internal unit, resulting in cleaner lines and an overall less "techy" appearance. I was concerned that the internal antenna might have resulted in reduced range but initial results with customer installations seem to indicate that this is not a concern. We have recently installed a unit in an attic conversion in an average suburban semi-D and the customer reports excellent reception throughout the ground and first floor rooms.

The user interface is pretty standard Linksys fare and it's an interface that we like. Features such as wireless security, MAC-address filtering and port-forwarding are all easy to access. We haven't been using these units long enough yet to establish if they need occasional re-setting (as do many domestic-grade units), but we'll update you on that in due course.

So what does one of these units actually do? Firstly, it has a built-in ADSL modem, which means that it allows you to connect to a broadband service-provider e.g. Eircom, BT, Imagine, UTV etc. (not NTL, which requires a cable modem). Secondly it provides a 4-port ethernet switch which allows up to four PCs to be connected via ethernet cables into a home network. Thirdly, it provides a wireless access point for up to 32 PCs or laptops to connect wirelessly with the unit. And, finally, it has a built-in router that allows PCs connected to the unit, either wirelessly or via ethernet cable, to connect to the internet and share a single broadband connection. In other words it's a single one-box solution for setting up a wireless home network that can share a broadband internet connection. With a hardware firewall thrown in, it's hard to beat. While there is a wide range of manufacturers of home networking products out there, Linksys, which is part of networking giant Cisco, remains a firm favourite of ours and the only brand that we install.

Wednesday, March 22, 2006

Timed Shutdown

Would you like to be able to have your PC automatically shut itself down at a set time at night, so that you don't have to worry about going to bed and forgetting to turn it off? Or do you ever find yourself with a program running as you are about to leave the house and would like the PC to turn itself off after the program has finished? Or perhaps you have two or more PCs in your home network and you would like to be able to turn all PCs off from the PC you are working at? Well you can do all of these things, and much more, with a free utility called Poweroff that comes free courtesy of Belgian Jorgan Bosman.

You can dowload this utility from here and simply unzip the contents of the download to your desktop. You'll then find the Poweroff icon (above) on your desktop. Clicking on this brings up the user interface which, again, is pretty straightforward. There are basically four different sections in the interface that you have to make decisions about. The first is what computer you want to take an action on - this is either the local computer i.e. the one you are currently working on, or one of your network (remote) computers. The next decision is what action you want to take. You can see from the screenshot that there are quite a few actions but, in most cases, the one that will be of most interest is to Poweroff your computer. There is a set of options that can be selected, if required, such as to allow a machine to be controlled remotely or to display a message before an action is taken. Finally, there is the section to specify when the action is to be taken. This can either be immediately, after a process (program) has finished running, or according to a schedule that can be easily set up (time, date, day of week, etc).
PC Medic uses Poweroff to shut down the PC in the workshop every night at 11.00 pm and to turn off our multimedia PC after late night television programs have been recorded. Use it for a while and you'll wonder how you managed without it. Well worth the download.

Tuesday, March 21, 2006

Lured to Wrong Address

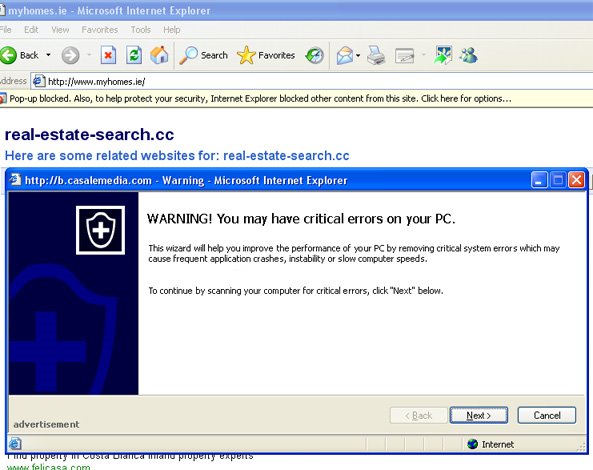
I had a call from a customer yesterday to say that they were trying to look at content on the www.myhome.ie website and they were getting repeated messages that their system had critical errors. In fact they were getting so many pop-up windows with this message that their machine ground to a halt and they had to reboot. Sounded like spyware to me and and I happened to know that this particular machine had no antispyware installed as it was an oldish PC running Windows Me.

When I got around to the customer's house I found that the problem was reproducible when the bookmarked www.myhome.ie website was visited (see screenshot) but not when I visited any other website?!? If a PC is infected with spyware it normally doesn't care what website you are visiting - as soon as you go online the pop-ups begin. This was different and had me scratching my head for a couple of minutes. Then I saw it! The bookmarked website was not www.myhome.ie but www.myhomes.ie - note the extra "s" at the end. I suspect that this site is designed to lure people in who are looking for www.myhome.ie and then barrage them with pop-up advertising for dubious products. A pop-up blocker, as found in Windows XP, or some home security products would keep the pop-ups at bay, but not for an unprotected Windows Me machine. Just be careful when typing those web addresses.

Thursday, March 16, 2006

Jammed Discs


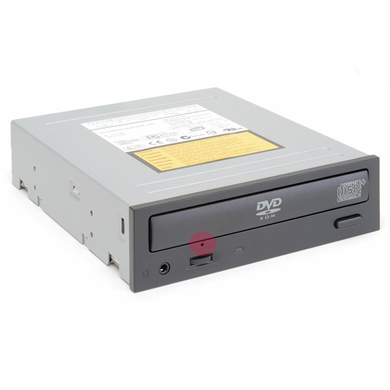
It can happen all too easily. You're in a hurry and you don't seat the disc flush in the tray of your computer's CD/DVD drive. You press the close button, the tray slides in and ... the disc jams. I've done it myself ... on more than one occasion. On other occasions a disc is put correctly into the drive but, possibly because of finger marks or scratches, won't eject when the eject button is pressed. If you find that you can't reopen the tray by pressing the eject button on the drive, don't panic. This is a situation that manufacturers of CD/DVD drives have anticipated. If you look closely at the front of your drive, generally to the left and below the tray you should see a tiny hole (highlighted in the accompanying picture). What you need to do is to get yourself a paper clip and straighten it out so that you have at least 2-3 cm of straight clip. Turn the power off on your PC and insert the clip into the hole. When it's in about 1 cm you shoul feel some resistance - keep pushing gently and the drawer should pop open enough for it to be gently pulled open and the disc recovered.

Tuesday, March 14, 2006

On an Island


It's been a busy few days and I haven't had a chance to prepare a technical post, so I'm going to leave you with a musical recommendation. David Gilmour released his new solo album, On an Island, last week and I've been listening to it in the workshop. Very relaxing stuff and, since he was the voice and guitar of Pink Floyd, very reminiscent of latter day Floyd. Enjoy.

Friday, March 10, 2006

Check the Simple Stuff First!

Windows XP User Accounts

When you buy a new PC with Windows XP installed, you can be pretty certain that when you turn it on there will be one single account configured and that will be a Computer Administrator account. There are two types of user accounts that you can create on an XP system - a Computer Administrator account and a Limited account. So what's the difference. Well the clue is in the names!

A Computer Administrator account, also known as a super-user account, or God account, allows you full access to the system in terms of access, permissions and configuration. You can create or delete other accounts, by-pass passwords set by other Computer Administrator accounts (and, naturally, Limited accounts), install and remove software, and configure a lot of the innards of Windows that only the brave or the foolish should even contemplate. So, given all this, it's somewhat surprising that most parents create Computer Administrator accounts for their 8-16-year old children when they ask to have their own account on the computer. Well, actually it's not that surprising as it hasn't been explained to most parent's by the nice (insert your favourite PC store here) salesperson that this is really not a very good idea. Nor is it to be found in any of the (sparse) documentation that accompanies most PCs nowadays.

Here's how it should work. There should be a single Computer Administrator account that should be used only for, you guessed it, computer administration. This mainly entails setting up Limited accounts for all users, and installing and removing software as required. Needless to say, this account should be password protected and the password known only to the designated admin person (Mum or Dad). Everyone else should have a Limited account.

One of the primary reasons for using the Limited account is to protect the system from yourself. It's possible that a family member with Administrator access can accidentally change or delete critical information on the computer. It is also possible that someone with an Administrator account may have their account hacked or become infected with a virus or worm of some sort. Typically, the attacker or malware will be able to wreak havoc on the system using the access privileges of the account that has been compromised. So, it makes sense to save your Administrator account for when it is needed, but use Limited accounts for everyday use by most users.

To manage your user accounts go to Start>Control Panel>User Accounts. When it comes to managing user accounts on a home PC it's certainly a case of less is more.

Thursday, March 09, 2006

What PC?

One question I'm asked frequently is "Who do you recommend I buy my next PC from?". While PC Medic does not formerly endorse any particular brand of machine we can say that Dell represents particularly good value for money when it comes to desktop PCs and you normally get up to date technology at a pretty good price. We would also say that we see very few Dell PCs in the workshop with hardware problems, so reliability seems reasonably good. Also in their favour is good on-line support via their web-site. What we don't particularly like is the fact that a lot of their post-sales support is off-shore, India I believe, and this can lead to some communication problems at times. And, as mentioned in an earlier post (Slipped Disks) they no longer include the OS and driver disks as standard with their Dimension PCs.

For laptops, Toshiba is a brand that impresses. Good features at a reasonable price, good build quality and OK system recovery features (they don't supply the OS disk either :-( but supply a Norton Ghost image on disk to get you up and running in the event of a major problem). If money isn't a problem, and you want a laptop to last, I'd recommend Lenovo, which now manufacture the IBM range of laptops (check out the gorgeous X41). My understanding is that Lenovo are making the same laptops with the same personnel in the same plants, so quality should be identical to when IBM owned the business. Time will tell.

Wednesday, March 08, 2006

OEM DVD Woes

A customer contacted me today to tell me that he had bought a new DVD drive for his computer, which he installed himself in the hope of being able to watch DVDs on his PC. Unfortunately, when he inserted a DVD in the drive and launched Windows Media Player he was greeted with an error message stating that there was no video codec present. At this point he contacted PC Medic for help.

The customer had purchased an OEM (original equipment manufacturer) DVD drive to save money. OEM components generally come in a brown box with no instructions and no software and are intended primarily for system builders. However, if you feel reasonably confident about installing hardware without detailed manufacturers instructions then some money can be saved by going down the OEM route. What the customer didn't realize is that Windows XP does not natively have built in DVD decoding capability, because of licensing issues, and the decoding software is generally only supplied with what are termed "retail" packs. These are the printed boxes of components that you find on the shelves of PC World.

A decoder performs three functions:
It unlocks the copy protection applied to the video files on a DVD movie disc;
It decodes the MPEG2 formatting applied to video content;
It displays the video through a viewer program installed in Windows.

The solution was to purchase a commercial decoder and install it. A number of options were available for download from NVidia, Sonic, Cyberlink Corp. and Intervideo Corp. so we went for DVD XPack from Intervideo at $14.95. A simple install and he was up and running with his new DVD player.